MUSICAL FEATURES
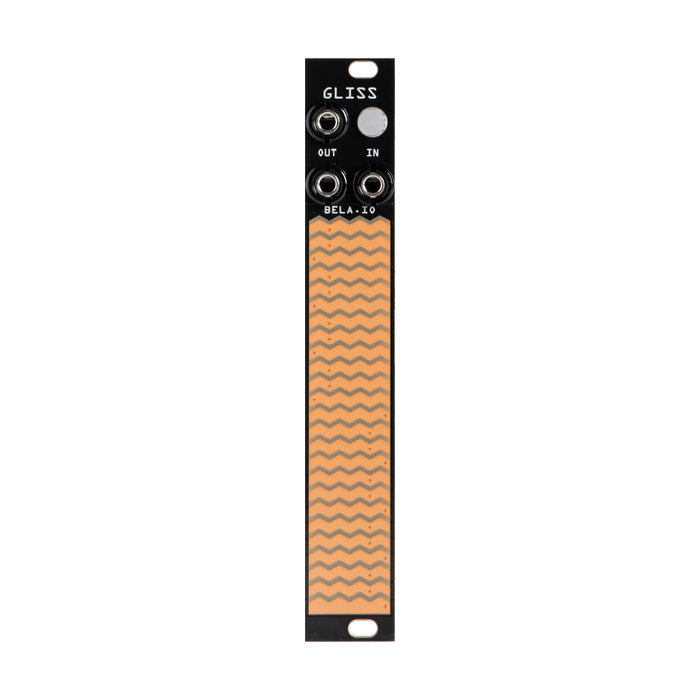
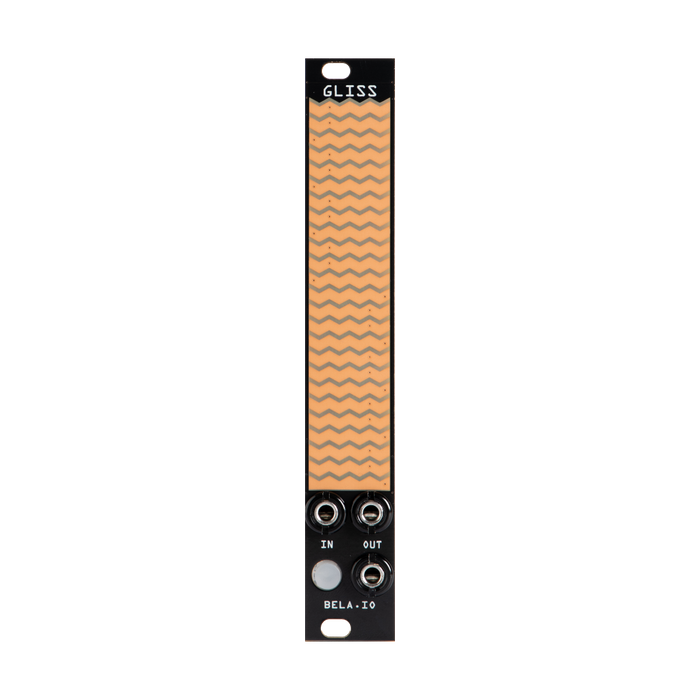
Gliss is a 4HP Eurorack module for introducing gesture control into modular systems by moving and playing your fingers on a recordable touch strip.
Gliss simultaneously generates two high resolution signals: onefinger positionThe other istouched sizeDepending on.These signals are available via two CV outputs, providing two dimensions of control within the system.Gestures can be recorded for up to 2 seconds, after which they can be looped, triggered and clocked.This makes it easy to do everything from touch-controlled long modulated signals to custom LFOs, envelopes and oscillators.This can be a very useful tool that allows you to create exactly the modulation you envision for a particular parameter in real time.
Despite its compact size, Gliss can be a powerful visualization tool, providing clear feedback of both internal and external signals by diffusing LEDs through the faceplate.The external signal isThe ability to clip, offset, scale, scale and smooth with touch extends CV utility work into the interactive and performative realm.
Gliss offers a wide variety of functions through an easy menu system.This includes a tunable 5-key keyboard with glissando and vibrato, a 5-step sequencer, wave shaper, wave table and more.Additionally, Gliss is open source, allowing users to hack, remix, and extend its modules.
- Direct module control, touch position and touch size available as control voltage
- Record gestures up to 60 seconds
- Loop recorded gestures to create LFOs with custom waveforms
- Trigger recorded gestures for custom envelopes
- Play an adjustable 5-key keyboard with glissando and vibrato
- Scale, clip, offset and visualize external CV and audio signals
- Open Source
- Equipped with a capacitive touch sensor with sub-millimeter accuracy
- Fast processing with STM32 Cortex-M4F microcontroller
- 23 RGB LEDs for visual feedback
- bicolor button
- 1x monojack input (-5V to 10V)
- 2x mono jack outputs (-5V to 10V, range configurable)
- Firmware update and customization using USB microsocket
How To Use
modes and menus
Gliss touch functionality is used in one of four performance modes:
-
Control mode It generates CV and gate signals based on your finger's exact position and touch size (how hard you press on the sensor).Depending on the settings, there are options such as outputting two finger positions or two touch sizes.Immediately after turning on the power, it starts up in control mode.
-
Recording mode Draw waveforms directly into the system, record gestures of up to 60 seconds, and play them back in a variety of ways (loop to create custom LFOs, trigger as envelopes, etc.).Real-time corrections are also possible.
-
signal mode Visualize any signal and performance-wise scale, offset, and smooth CVs, output the processed signal, the input's envelope, or both.
-
note mode 5 notes at fixed, user-configurable voltages. It can be used as an expressive keyboard with five pressure-sensitive buttons, or as a step sequencer played using your input signal.
The pages for switching between these performance modes, switching settings for each mode, and switching voltage ranges for each mode areMenuIt is called.In addition to this mode setting menu,Global settings menuHigher level settings are possible with .You can also recalibrate Gliss at any time using the calibration mode.
For details on each performance mode and settings for each mode, see the explanation for each performance mode below.First, let's talk about menus and global menus.
Menu
The menu can be entered by pressing the button and tapping the strip with two fingers.Press the button once to exit the menu.

When you enter the menu, the strip willIt is divided into 5 sections corresponding to the setting items, and select the items you want to set.The top section is a green mode selector, the next two or three are red setting selectors, and the bottom is a blue or white voltage selector.
-
Mode selector A mode selector is used to switch between four performance modes.Tap the mode selector to move to the next mode.A short animation is played representing the current mode.You can skip the animation and go to the next mode by tapping the mode selector again.
-
Settings selector The settings selectors (two or three depending on the mode) can be used to change the settings of the current mode to fully customize its behavior.In most cases, these setting selectors cycle through the set of available options on tap, but in two instances they act as continuous input selectors.
-
voltage range selector The input voltage range and voltage range for each output can be customized in all modes.
Gliss is preconfigured for all voltage ranges from 0V to +10V (full voltage range is -5V to +10V), but you can set the input and output voltage ranges for each performance mode.Customizations apply only to the current mode and do not affect other ranges.
To customize the voltage range for a particular mode, tap the voltage range selector and follow the steps below.
After selecting the voltage range selector, you will see three gold selectors.Each selector isSet the input voltage range, upper output voltage range, and lower output voltage range respectively.
Customizing the voltage range means specifying the minimum and maximum voltages that Gliss can receive or transmit from other devices in a particular mode.The voltage range you set is specific to the current mode and will be remembered even if you turn off the module and turn it back on later.This is to make Gliss as flexible a performance tool as possible.
Select a preset or set the voltage range manually.When using a preset, tap the input or output selector you want to customize from the voltage range menu, and the voltage range will switch with each tap.Indicated by the range highlighted on the touch strip: ● 0V to +10V (default) ● -5V to +5V ● 0V to +5V ● -5V to +10V
You can set a custom range if you don't want to use the presets.
From the voltage range menu, press and hold the selector for the input or output you want to customize for 2 seconds. After 2 seconds, you will see two touch points on the touch strip.These represent the minimum and maximum voltage levels for this input or output. You can use two fingers to drag these to the desired voltage range.When you adjust the range, the input or output you are adjusting will output a signal that oscillates between minimum and maximum, so you can "hear" it as you set it.To facilitate this task, the voltage range is specified in 2V increments.Keep your finger pressed on the touch strip while setting the range.Lift your finger to set the range at that point and return to the voltage range menu.
global menu
Global settings menucan be entered by pressing the button and tapping the strip with three fingers.

The selectors in the Global Settings menu apply settings consistently across modes and are the ones you rarely need to adjust.When you enter the menu, you will see three orange selectors from the top and a red selector below.Orange sets the touch sensitivity, LED brightness, menu animation toggle, and red the module orientation respectively.
1: touch sensitivity Gliss can sense not only the position of the touch, but also the size of the touch.The touch size is approximately equal to the force you press against the touch strip.If you press hard against the strip, the touch size will be large, if you press lightly, the touch size will be very small. Gliss is tuned to be as responsive as possible, but everyone has different finger shapes, skin capacities, and touch habits.With this selector, you can apply gain to adjust the touch size and feel just right.Tap the selector to adjust the touch sensitivity.Selectors turn into pointers.Adjust by sliding your finger from the bottom (no gain) to the top (maximum gain).Release your finger to finish the adjustment.While adjusting this setting, finger touch size is processed through gain and output as CV from the bottom output.You can use this voltage as a 'preview' of your adjustments so you don't have to keep exiting this menu to try out changes.
2: LED brightness This setting adjusts the brightness of the LED that illuminates the touch strip, so you can customize the brightness for maximum visibility. Especially useful when using Gliss outdoors or in dark conditions.Tap the selector to turn it into a continuous slider.Place your finger on the lit dot and adjust to the bottom (minimum brightness) or top (maximum brightness) of the touch strip.Release your finger to finish the adjustment.
3: Switch menu animation This setting displays animations while using the menu to remind you what each setting does.It's a good idea to have a manual or cheat sheet handy at first to see your options so you can remember your role.Once you've familiarized yourself with the settings selector, these animations serve as useful reminders of the feature.Hold this selector for 3 seconds to turn the animation on.Pulsates when the animation is active.Then, when you change the mode settings in the menu, you'll see an animation that reflects the function of the changed parameter.
4: module orientation Gliss is assembled with a faceplate with jacks and buttons placed on top of the module.But because every synthesizer and setup is different, it comes with a second faceplate that places the jacks on the bottom.This allows you to choose the orientation that works best for your setup, or change your mind later.To choose the orientation, press and hold the red selector at the bottom of the touchstrip.A pointer appears at the bottom or top of the current orientation.If the pointer is not at the bottom, slide it to the bottom to flip the Gliss controls.Note that everything automatically flips when you change orientation.This means that "top output" refers to the topmost output, no matter which way it is oriented.No need to remember or remap.By adjusting this setting, Gliss will do all the work for you.
Performance Mode 1: Control Mode

Control mode allows you to generate a CV signal with the touch of your finger.The items that can be set from the setting selector in the menu are as follows.
Selector 1: Control type This setting allows you to choose the type of control.the defaultincluding a combination of finger position and touch sizeSelect the following options in order:
-
single slider Output finger position (top output) and touch size (bottom output) for a single touch point
-
dual slider Output the positions of two fingers
-
dual touch 2 touch-sensitive pads that output the touch size of 2 fingers
Selector 2: Latching Latching means holding the value when the touch ends.Any control type can use latching.There are 3 options for latching:
-
unlatch Both CV outputs go to 0V when you remove your finger from the touch strip.
-
latch When you remove your finger from the touch strip, both CV outputs will hold at their last value (either position or touch size if using a dual slider or dual touch control type).
-
position latch When you remove your finger from the control strip, any position-mapped CV output will be held at its last value.This setting does not apply to touch size.
Creative Uses of Latching Position-only latching can be a useful performance tool.Here are some ideas for using it:
Performance Mode 2: Record Mode

Record mode allows you to record custom gestures for up to 75 seconds. Gliss starts recording your gestures the moment you place your finger on the touchstrip and saves them when you lift your finger again.
Record mode also offers a variety of ways to play gestures, allowing custom LFOs, envelopes, and many other ways to create modulated signals.The items that can be set from the setting selector in the menu are as follows.
Selector 1: Touch input type You have three options:
- single slider Use the entire touch strip to record gestures that combine finger position and touch size.
- dual slider Each half of the touch strip is a slider and two independent finger position gestures are recorded (no touch size).
- dual touch Each half of the touch strip is a touch-sensitive touchpad, and gestures of two touch sizes are recorded (no finger position).
Selector 2: Playback There are five options for how recorded gestures are played: Loop, Trigger, Clock, Wavetable and Waveshaper.
Playback method 1 Loop: With loop playback, you can start recording gestures up to 75 seconds by placing your finger on the touch strip.Lift your finger and Gliss will play your recorded gestures endlessly.Gesture at any time by placing your finger on the touch strip and recording a new gesture.Overwritecan.Loop playback allows a button or trigger to re-trigger the gesture (i.e. restart the loop from the beginning).
When using dual slider and dual touch input types, the two gestures do not loop synchronously, they loop completely independently.Additionally, both gestures can be overridden independently.Press and hold the button for 2 seconds to clear the loop gesture.In dual slider or dual touch input mode, you can clear only one gesture by holding the button and placing your finger over the gesture.
Playback Method 2 Trigger: With trigger play, the gesture is played once when a button is pressed or when an input receives a trigger signal.In this way, recorded gestures can act like custom-shaped envelopes. Gates are shared in dual slider and dual touch modes2 types of envelopescan be created.
In trigger playback mode, by defining the attack and release parts, the gate signalsustaining envelopecan be made.To create a custom attack/release envelope:
- Make sure trigger playback is enabled (settings selector 2, setting 2).
- Draw the first part of the envelope, keep your finger on the touchstrip and press the button to mark the end of the attack part.Do not lift your finger.
- Draw the release part of the envelope.Lift your finger to complete the gesture.
Playback method 3 C Clock playback allows you to record your gestures and synchronize them with an external clock signal and input.With clock playback, you can record different gestures one after another and lift your finger between each one.
During clock playback, the button flashes each time a trigger is received on the input.While recording gestures, the module counts this clock signal and synchronizes the duration of each gesture to the nearest tick.To record a series of gestures:
- Tap the button.It turns red to indicate that recording has been armed, and recording begins when the next rising edge is received at the input.
- Record your gestures on the touch strip.This gesture can consist of multiple touch events, so you can lift your finger from the sensor any number of times while recording.
- Press the button again.Recording will stop when the next clock edge is received.
When using the Dual Slider or Dual Touch inputs (settings selector 1), both halves of the touch strip can be recorded together or separately. (If half of the touchstrip is not touched during recording, nothing will be recorded and the existing recording will remain.) When recorded together, the loop length will be the same.Recorded separately, loops can have different lengths - great for polyrhythms.Tap the button three times quickly to clear the current recording.The touch strip flashes red momentarily to confirm that you have cleared the recording. When using the Dual Slider or Dual Touch input types, you can delete just one of your recordings by placing your finger on that half of the touch strip while performing three quick button presses. increase.That half of the touch strip flashes red when the recording is cleared.
Sequence length synchronization
If you have already recorded one or more gestures and are looping, you can start a new recording.The length of that new sequence will be a multiple of the sequence used as a reference.To do this, press the button twice to arm the recording.Recording will begin the next time the reference sequence restarts.Tap the button once when you are done recording.Recording will stop the next time the reference sequence begins.
The length of the sequence depends on the touch input type you are using. When using the Dual Slider or Dual Touch inputs, the "sequence length" is the loop length of the other half of the sensor you are not recording. When using the Single Slider input, the "sequence length" is the length of the last recorded gesture you are overwriting.
Create loop without clock (record discrete CV)
If you don't have a clock signal available, but want to create loops with multiple gestures, no problem!Multiple gestures can be recorded even if no clock signal is present.The only difference is that the length of the loop is the time between pressing the button to start recording and pressing it again to stop recording.To record a loop without clock:
- Press the button once to start recording.
- Record a gesture (you can lift your finger between touches if you want).
- Press the button to stop recording. When using Dual Slider touch input, you can record different loop lengths for the top and bottom sliders.
This mode is ideal if you want to create a modulated signal that contains discrete step values rather than continuous changes. Touch the Touch Strip and then lift your finger to record and draw rising and falling values between different points.But using a button to trigger playback allows your finger to move away from the Touch Strip, creating a gesture where the value instantly jumps from one to the other.
Playback method 4 Wavetable: Wavetable uses Glissvoltage controlled Make it a wavetable oscillator.The recorded gesture is a waveform and the CV input isIt becomes the pitch control of V/Oct. The 0V input has a frequency of 65.4Hz (corresponding to the C2 note).
Customized voltage ranges are ignored in this playback mode. To get the most out of Wavetable, we recommend setting the output range from -5V to +5V, similar to Eurorack VCOs.The output can be treated like an audio signal, allowing Gliss to be connected directly to Eurorack-level mixers.
The timbre of the sound is highly dependent on the starting and ending values of the gesture.Having the gestures start and end at the same point on the Touch Strip results in a more mellow tone, with less overtones and distortion.This is because the waveform starts and ends at the same place, thus avoiding sudden jumps in values during playback.
On the other hand, if you want a more complex tone with many overtones, try starting and ending the gesture in two different positions.
Recorded gestures can be updated at any time. Simply draw a new pattern on the Touch Strip.You can also use Dual Slider or Dual Touch input to get two simultaneous wavetables.Both will have the same pitch, but will have different timbres depending on the gesture you record.
Playback Method 5 Waveshaper: Waveshaper playback lets you record gestures and scrub through them using input voltage. Waveshaper playback maps the input range to the length of the gesture.For example, if the input range is -5V to +5V, an input of -5V corresponds to the beginning of the gesture, an input of 0V corresponds to the middle of the gesture, and an input of +5V corresponds to the end of the gesture.This means that the input voltage can be used to reproduce different parts of the gesture.See the figure below for an example.

Example in Waveshaper playback mode.The left is the recorded gesture, the middle is the input voltage, and the right is the corresponding output voltage.Scan the gesture voltage recorded by the input voltage.
Performance Mode 3: Signal Mode

Signal mode allows you to visualize and manipulate the input signal, greatly increasing the flexibility of your existing modulation sources.Clip, scale, offset, and smooth CV or audio signals, ready to pass through the system.
-
clip: You can limit the maximum and minimum values of the input signal.This allows you to keep the signal within a certain range and allows for better compatibility with other modules.
-
Scale (attenuate/boost): Adjust the amplitude of the signal.This allows you to increase or decrease the magnitude of the signal.
-
offset: Adds or subtracts a constant value to the signal to adjust the overall level.This allows you to precisely adjust the bias of your signal.
-
Smooth: Smooths sudden changes in the signal.This allows you to soften transitions and waveform edges.
In this way, signal modes provide the ability to modify external signals and tailor them to different uses within a modular system.The items that can be set from the setting selector in the menu are as follows.
Selector 1: Input signal There are two options for this setting:
-
Control voltage (DC coupling): Select this option if the input is a CV (Control Voltage) signal.The input signal is visualized as a pointer moving up and down on the touch strip.
-
Audio signal (AC coupling): Select this option if the input is an audio signal.This setting visualizes the incoming signal like a classic VU meter on a mixing desk.
These selections are used to select the best input signal type for a particular application. For CV signals, it allows precise visualization as the modulating signal of the system, and for audio signals, it provides visual feedback to confirm the intensity and dynamics of the sound.This way, choosing the right settings will give you the best information and control for your work.
Selector 2: Output mode There are three options for this setting.These options determine how the input signal is processed and output.
-
signal/reverse signal: The top output passes a clipped, scaled, and shifted version of the input signal.The bottom output passes the inverse of the top output.
-
Signal/envelope detector: The top output passes the input signal.The bottom output passes a scaled and shifted version of the smoothed envelope of the clipped signal.
-
Envelope Detector/Inverted Envelope Detector: The top output passes the envelope detector, which is a smoothed signal that rises and falls with the peaks of the input signal.The bottom output passes the inverse of this envelope detector.
Selector 3: Envelope decay control This is a continuous setting with a single blinking dot representing the current value.Slide to adjust.
Envelope Decay controls the amount of smoothing applied to the decay of the envelope detector output.This can have the effect of softening the signal response or smoothing out sharp peaks and valleys.
Below are diagrams of the input signal and the resulting envelope attenuation, with different smoothing levels applied, but since the text does not include the diagrams, no concrete visual representation is provided.This figure will help you visualize how different levels of envelope attenuation affect the signal.As the envelope attenuation increases, the signal fluctuates more smoothly, with more gradual peaks and valleys.
CV process in Signal mode
One of the great features of Signal Mode is its ability to scale and offset the input signal from other modules on the fly, offering interesting playing possibilities.
Make sure you are in signal mode to scale and offset the CV signal.
CV input is visualized on the touch strip.Place two fingers on the touch strip to scale and offset this input signal.A gold dot appears under the top finger (representing the maximum scaled voltage level) and a gold dot under the bottom finger (representing the minimum voltage level).Place two fingers on the touch strip.Slide these points to scale the signal.You will see an animated dot representing your input move between your fingers.You can not only scale the input signal, but also offset it.While your finger is still on the touch strip, drag a scaled voltage range within the full specified input range (2-2V by default).
The selected value is saved as soon as you lift your finger from the touch strip.This feature allows you to adjust the CV signal in real time and quickly change the behavior of the signal throughout the system.For producers and performers, this type of control is an important tool that enhances the creative side and experimental manipulation of music.
Press the button while in signal mode to clip the CV signal.The button turns red when clipping is enabled.Once clipping is enabled, you can set the minimum and maximum clipping points by sliding the red dot on the touch strip.This allows a portion of the input signal to pass through to the output.
The clipping function is a powerful tool for emphasizing certain parts of a CV signal or removing the rest.This allows the module to be tuned to react only when the signal exceeds a certain threshold, or to focus on specific parts of the signal.
Audio processing in Signal mode
Selecting an audio input with selector 1 allows you to visualize the incoming audio signal with the level meter.When using an audio input signal, the signal at the input of the visualization and envelope detector is obtained from the input signal by applying a DC blocking filter and a 12ms RMS window.The visualization is displayed on a logarithmic scale like a level meter.
If you select one of the envelope detectors for the output (settings selector 2), you'll also see a smoothly animated animation of the output above the VU meter.This is a chain of peaks in the audio signal that decay more slowly than the audio signal itself.Envelope detectors are especially noticeable on input signals with loud transients (sounds that rise and fall quickly, like drum hits).
This feature is a great way to visually capture the characteristics of an audio signal in real-time, and is extremely useful during the effects tweaking and mixing process.Easier to understand signal behavior allows for more sophisticated controls and adjustments.
Scale, offset and clipping work the same for audio signals.Clipping works like a weird distortion.
Performance Mode 4: Notes Mode

Notes Mode turns the strip into a tuned set of notes.These notes can be played like a finger-plucked keyboard (with expressive glissandos and vibrato) or like a sequencer triggered by a clock signal (each step behaves highly customizable).
Notes Mode has more complex customizations not available in other modes, so you can configure which notes are available and how they behave to your liking.
This mode can open up new dimensions in musical expression and production, giving performers a way to manipulate musical elements in real time.By setting specific note sets and scales, performers can optimize control and manipulation for specific musical contexts.The items that can be set from the setting selector in the menu are as follows.
Selector 1: Play mode You have two options:
- Keyboard In keyboard play mode, notes on the Touch Strip can be played by touch and have an expressive function: press a note and wave your finger.vibrato, and when you slide between notes it becomesGlissandoIt will be.
-
sequencer When playing notes as a sequencer, the notes are triggered in sequence by the incoming clock signal.Pressing a step resets the sequencer position to that note.
Selector 2: Quantize This setting relates to note quantization. You have two options.
-
Quantize OFF When OFF, pitch is not quantized and voltage levels between 12 notes can be achieved.
-
Quantize ON When turned ON, the pitch will be quantized.
This setting can be chosen depending on how tightly you want to control the pitch of your notes.Quantization ON makes it easier to tune to a particular scale, while OFF allows a more free and experimental approach.
Selector 3: Additional variable setting This is a continuous setting.Pressing the selector displays a blinking dot representing the current value.Slide the points to adjust.In keyboard mode, when you wave your fingerVibratoin sequencer mode.Glidecontrols the size of the
Setting the output scale
Notes mode is set to the pentatonic scale with the first five notes, but the notes are fully customizable.Adjusting a note means that you can set the exact voltage level sent by the upper output when that note is played.It doesn't matter if you are in keyboard mode or sequencer mode.
To adjust the note, make sure you're in note mode, then press the button three times quickly.When a note is ready for adjustment it will begin to pulse on the touch strip and the button will light red.Notes can be adjusted manually or by CV input.After adjusting, press the button once to return to active mode.
-
Manual adjustment To manually adjust a note, press and hold the note you want to adjust.Without lifting your finger, sliding from a note towards the bottom of the touchstrip will show its current adjustment as a single blinking point.Hold your finger on the touch strip and slide the point up or down to adjust the note.
It is easy to specify the correct voltage when quantize is ON.Note that the stored voltage may be slightly different than what you were aiming for, due to finger lift displacement.To prevent this, press the button while your finger is still on the touchstrip.This will save the exact voltage you were holding.
-
CV input adjustment It is common for many people to find adjustments with CV inputs easier.This is because there is no scale guesswork involved in choosing the exact value for each note.
To modulate notes with the CV input, connect a volt-per-octave CV (from a keyboard, sequencer, or another module) to the input.Play a note from your connected device and press the note on the touch strip you want to adjust to that voltage level.
Keyboard settings Using notes as a keyboard (settings selector 1) allows notes to be triggered by tapping on the touch strip.Pitch is sent from the top output, so it can be patched to 1V/Oct such as VCO, and finger touch size is sent from the bottom output, so it can be patched to CVin of VCA or gate input of envelope.Expressive controls Playing notes as a keyboard also gives you expressive features such as:
- Add vibrato by holding the note down and waving your finger (the vibrato range is set with Settings selector 3).
- Slide continuously between notes to create a glissando.
Keyboard Settings: Customize Number of Keys By default Gliss is set to a 5 note keyboard, but you can choose from 1 to 5 notes.
To change the number of notes on your keyboard,note mode, press the button twice.The note will start flashing and the button will flash red.Now you can tap to disable or enable notes.Only selected notes are placed on the keyboard, and the voltage level associated with each is set.Once you have selected the desired note, press the button once to confirm.You can see that the notes are positioned using the full length of the touchstrip.
Sequencer settings: When using notes as a sequencer (setting selector 1), each note becomes a step in the sequencer, and each step is stepped forward by the input signal.The top output delivers the voltage associated with the currently active step and the bottom output delivers the trigger for each active step.Typically use the input with a clock, the Top Out patched to the VCO's 1V/Oct input, and the Bottom Out patched to the Envelope's Gate input.
If the current step is the first in the sequence, the trigger output is +10V.Otherwise the trigger is +5V.In addition to customizing the glide between steps (using setting selector 3), you can also customize the behavior of each step.
Sequencer settings: Select next active step While in active mode with the sequencer, you can select the next note to be played on-the-fly by tapping.That step will be played next, and the sequence will continue looping from that note.
Sequencer settings: Step settings Each of the five steps can be set independently.In performance mode, the steps will appear on the touch strip, press the button twice.The step will now pulse.Each step can be in one of four states, and you can toggle between these states by tapping the step.Available states are:
-
Active (green, default) This note will be played when triggered.
-
hold (yellow) The previous note will be held until the next trig and no trig will be sent from the Bottom Output.
-
mute (red) Disable this step.The output is 0V and no triggers are sent from the Bottom Output.
-
Skip (off) Ignore and skip that step from the sequencer.
Sequencer settings: Tuning in sequencer play mode It is also possible to retune steps in real time while the sequence is playing in Sequencer Play mode.Press the button three times and follow the instructions in the 'Note Tuning' section.When tuning in sequencer mode, only manual tuning is available, but you can adjust the voltage associated with each step while the sequence is playing.
Other settings
Reset all menu settings
This will reset all settings on the module to factory settings.Calibration is also reset. To reset Gliss:
- While pressing the button, place five fingers on the touch strip.The button will start flashing red and green. Hold for 5 seconds.The touch strip will start flashing gold on the top half and red on the bottom half.
- Release the button, but leave two fingers on the touchstrip, one on the top half and one on the bottom half.
- The touch strip lights up and down from the center.Gliss resets when the entire touch strip turns green.After resetting the settings, Gliss will be in factory test mode.