MUSICAL FEATURES
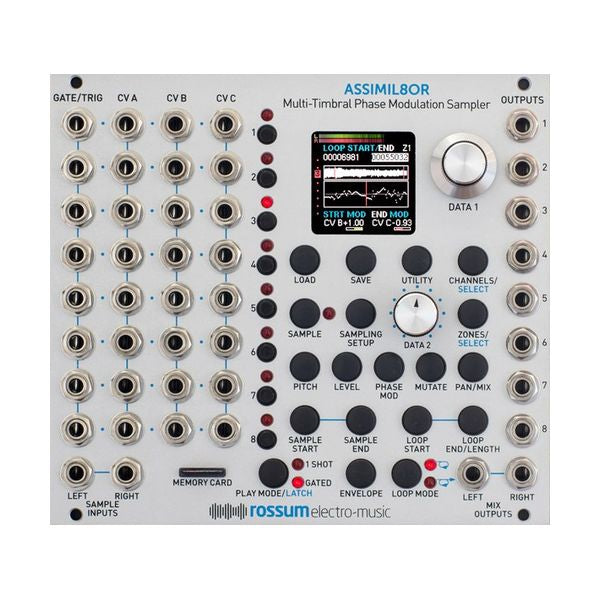
ASSIMIL8OR is a sampler module for a multi-timbral voltage-controlled modular synth. Powerful and flexible sampling engine capable of phase (phase) modulation.
With Assimil8or, you can build 8 independent samples, control the sound quality from hi-fi to lo-fi, and all can be assigned to voltage control.
- 8-channel multi-timbral operation is possible. Each channel can be taken from individual output or stereo Mix output
- Equipped with 24-bit high quality AD/DA converter
- Eight channels can be set to four stereos, eight monos, or any combination in between.
- You can assign up to eight more samples to each channel and select from them with CV
- CV sampling is also possible due to DC coupling
- Equipped with a phase modulation function from external signals and other samples.
- You can also adjust the quality of the sound by changing the sample rate and bits individually to get the texture of an older generation sampler. Number of bits and alias can be voltage controlled
- Extensive controls for sample operation and loop functions
- Voltage control for sample scrubbing
- Equipped with one-shot full sound mode and gate length sound mode, etc., you can control with adjustable attack and release envelope
- Equipped with Gate / Trigger input jack for each channel and 24 CV input jacks. Voltage controllable parameters include pitch, volume, number of bits, phase modulation, panning, sample / loop point, release time, etc.
- Micro SD card slot on the front for sample and preset management
- 2,330 seconds of sample memory (48kHz/mono)
- Sample rate 48kHz, 96kHz, 192kHz
- Internal process is 32-bit
- Ultra-low latency of 0.1ms (mix output) and 0.18ms (individual output)
Operations Guide
Folders, presets, channels, samples
In Assimil8or, the data in the micro SD is recalled to the internal memory, and the samples are assigned to 8 channels from among them and played individually in various modes.Since the internal memory can be accessed very quickly, the latency is very low, less than 0.2ms. In Assimil8or only one folder is loaded into memory and active at the same time. Therefore, there is no limit on the size of the micro SD card, but the total number of sample files assigned to all presets in the active folder must be 422 MB or less.
Place the folder directly under the top folder of the micro SD card.
folderThat's it
presetIncludes 8 presets
ChannelConsists of Each channel contains all information such as sample assignments, playback methods, parameter values, and CV assignments. The folder contains this preset information and all the sample files assigned by the preset. Up to 199 presets can be used per folder. can be 8,16,24,32 bit, any sample rate, mono or stereo WAV file can be used.
To load a folder,
Load buttonPress. What appears immediately after loading a folder
Home screenThen rotate the DATA1 encoder → click
Load presetOr turn the DATA2 knob while holding down the Play Mode button to select the CV input assigned to DATA2. When another screen, such as the PITCH setting screen, is displayed, the home screen can be displayed by pressing the PITCH button again.
I loaded the preset from the home screen, but saved the preset.
Save buttonPress to do. To overwrite the current preset without changing the name, press and hold the Save button or the Data1 encoder for 2 seconds (a help message will appear on the screen). To change the preset destination, press the Save button, turn The encoder to change the preset, and press and hold the Save button or Data1. Click Data1 to enter the screen to change the preset name.
Basically, sample assignment etc. is performed from the sample in the active folder, but samples, channels, presets, etc. from another folder on the inactive micro SD card to the active folder
importCan. Transferring large data may take time to transfer to internal memory. To import, press the Load button first, just like loading a folder. Highlight the folder containing the samples / channels / presets you want to import and double-click the Load button . Open inside the folder, highlight the sample or preset you want to import, click and select Import. Channels are part of a preset, so highlight the preset, double-click the Load button again, select the channel you want to import and click ..
Channel settings
ChannelIs the sample played by the gate input and its playback parameter information. One preset has 8 channels. Change the channel assignment sample and make various settings as follows.
Channels/Select buttonPress to display the Channels screen, showing the sample name, channel mode (MD), and crossfade group (X) for each channel. In the bottom D2CV field, you can also select the CV input to assign the Data2 knob.

Channels screen
The sample name becomes the sample name of the first zone when the zone is set. The setting of how to associate triggers with other channels is called channel mode. The handling of stereo samples is also done here. is crossfaded by CV.
Change samplesTo do so, highlight the sample name and click the encoder to select the sample. If a new sample is already assigned to some other preset or channel in the active folder, it will be recalled immediately because it is already in internal memory, but if It is not already assigned from anywhere, it will take longer to load. May take a while. Also, instead of changing the sample, one
Copy channel information from other presetsTo do so, press and hold the encoder with the sample name highlighted.
Channel modeThe channel modes are as follows. To change the value, highlight the entry in the MD column and click on the encoder.
-
Master: Master mode is a normal trigger mode in which the sample is played by the corresponding Gate / Trig input.
-
link: Link mode does not react to the corresponding Gate / Trig input, but to the Gate / Trig input of the closest master mode channel above your channel. This is useful when you want to layer multiple channels. Multiple link groups can be created within eight channels. ..
-
Stereo/Right: Stereo mode is a mode to play the R side when the sample file is stereo 2CH. However, the Gate / Trig input will respond to Master mode channels above you. In addition, since stereo is assumed, the parameters of the sample are invalidated except For Pan, and the parameter settings of the Master mode channel corresponding to the L side are inherited. For Pan, L and R are not literally LR, but you can freely set Pan during Stereo Out. If you want to play one stereo file on CH3 and CH4, set CH3 to Master, CH4 to Stereo / Right mode and assign the same sample stereo file
-
Cycle: The channel in cycle mode is replayed at every gate between channels, including the closest Master channel on it, in turn. The Gate / Trig input of the Master Channel is used for playback, and it does not respond to the Gate / Trig of the Channel-mode channel.as a polyphony. It's an example of how to use a sample to make a sound.
Crossfade GroupWhen you change it, you highlight an entry in the X column and click the encoder. The channel that you want to cross-fade is assigned to the same Alphabet-cross-fade group.The CV used for cross-fades can be set at the bottom of the Channels page.
Zone settings
Each channel has eight samples assigned to it, and a CV can be used to switch back and forth between the samples and the "channel channel"
Areashe said. To switch and set the cosine samples for a zone, do the following:
Pressing the Zones / Select button displays the Zones screen, which shows the sample name, the corresponding voltage range for each zone in the currently selected channel, and can be changed by selecting it with the encoder. You can also select the CV input to be You can also switch in the lowest level field. You can also switch whether the zone switch occurs only at the moment of the gate, or during sample regeneration. You can also add or delete a new zone. As with a copy of the channel, a copy of the zone can be done with the encoder long push.

Zone screen
Parameter settings
The sample replayed with Assimil8or provides a variety of parameters that can be set in a knob by item or as an sign in the CV input.
To set a parameter, first select the channel you want to set. You can select the channel without playback the sample by pressing the Channels / Select button and pressing the channel button that you want to set.Also, if the channel has a zone set up, you can select it without replaying the zone's samples by pressing the Zones / Select button and then clicking on the numeric channel button for the zone you want to set.
Once you have selected the channels and zones, press the button for the parameter you want to set. Pitch, Level, Phase Mod, Mutate, Pan / Mix, Sample Start, Sample End, Loop Start, Loop End / Length, Play Mode, Envelope, and Loop Mode will be the buttons for the parameters to be set. When you press one of these buttons, the parameters that are displayed by the parameters are different, but the default values of the parameters, the assigned CV address, and the assigned CV Atten-Bata figures are displayed. You can quickly set the parameter values by highlighting the parameters you want to set by turning the DATA1 encoder, and then turning the DATA2 knob.If you want to set a small parameter value in the smallest unit , click the DATA1 encoder, then rotate it, and then click it to validate.For example, the DATA1 encoder can be adjusted in a single sample by setting the loop start point, for example.

Parameter settings screen example: Sample Start sample start position is highlighted.
-
Pitch: Pitch control. You can set preferences for CV input, atine beata settings, and default pitch, etc., for each sample or zone.
-
Level: The volume control is the volume control. You can set the CV input selection, the uten-batter setting, and the default volume of sound, etc., for each sample or zone.
-
Phase Mods: This is the button to open the phase (phase) modulation setting. You can select a phase modulation source, select a CV input for the modulation (index), or set the atine beata settings, and set the default parameter values for each sample or zone.
-
Mutate: Set various audio and audioquality settings. You can select bits depth, aliases, their CV input, and the attebata settings, reversing and smoothing settings.
-
Pan / Mix: This is a button that sets up panning and level in stereo Mix Out.You can set the CV input from the default value, and set the atteberta settings for each sample or zone. The level is relative to the amount of distinct output set at Level ..
-
Sample Start & Sample End: This is a button that opens a sample start or end setting. You can set the CV input from the default value, and set the atteberta settings for each sample or zone. The starting point, etc. is easy to set using both the Data1 encoder and the Data2 knob.
-
Loop Start & Loop End (Length): This is a button that opens a loop start or loop end (or length) setting.You can set preferences for CV input, atine beata settings, and default pitch, etc., for each sample or zone.Whether to specify a loop in length or on an endpoint is toggled by pressing this button long when the End or Length parameter is highlighted.The starting point, etc. is easy to set using both the Data1 encoder and the Data2 knob.
-
Play Mode: This is the button that sets the playback mode.When the 1Shot mode is gates, the sample is replayed from the beginning to the end.In Gated mode, the sample will continue to play back as long as it is OFF and it will be released according to the internal envelope.
-
Envelope: This is the button that sets the envelope. You can select from the default values for an attack or release, to select CV input, and to set the atteberta settings for each sample or zone. You can also set whether to start the attack while retaining. the height of the envelope at the time of the trigger, or start it from 0V.
-
Loop Mode: Toggles the Loop mode. The LED off is the Loop model off. When the LED is lit, the Loop mode is ON and the loop continues until it stops the manual when in one shot mode. In the Gated mode and Loop mode ON, the loop continues through the gate ON.The behavior after the gate OFF is different in the upper and lower LEDs, and the normal-loop mode is released when the upper LED is lit, and the lower LED is released into the Gated Loop mode and the gate OFF is released for the Sunple endpoint.
Sampling
Assimil8or has a 2CH input for sampling with a sampling button with a sample trigger, sampling with a trigger from CV input, and a sampling of the input level with a sresshold set.The settings related to sampling, including these settings, are accessed from the Sampling Setup button. When you are finished with sampling, you must press the Sampling Setup button and wait for the recording to wait.
Arm, to perform sampling in one of the ways listed above (even if you don't need an arm-free recording, you can record it). The Sample button is pressed again, the specified sample time is reached, and sampling is reached from The CV input that specifies the trigger for the second time.Select whether to keep the sample file from the Sampling Setup screen or truncate it

Sampling setup screen
The settings on the Sampling Setup screen are as follows:
-
destination: This is the end of the sample file. Select from the Unassigned, Channel 1-8, Empty Channel.
-
Record Mode: Once, we sample Sampling Time, or less, at a time, or less, as usual.It repeats the fact that Circular, until it stops sampling with buttons and CV, samples the time set by the Sampling Time, and then makes an overdub from the head.
-
Sampling Time: Set the time to sample.
-
Sampling Rate: Select the sanpurrate from 48kHz / 96kHz / 192kHz.
-
Naming Mode: Set the naming rules for the newly sampled files
-
High pass filter: Select DC if you want to sample your CV, or AC if you want to remove the direct current components in the audio sampling.
-
Arming Safety: Sampling Setup Set whether to make the arm state by pressing and holding the button mandatory. Selecting * HOT * eliminates the need for an arm to sample. However, even in this case, the arm state is necessary for Threshold sampling.
-
Level: Adjusts the input signal level from -30dB to +24dB.
-
Side: Left / Right / Stereo (sampled as stereo wav) / Dual Mono (sampled as two mono wavs)
-
Threshold and CV Trigger Assign: Automatically start sampling when the input signal level exceeds a certain value. To perform threshold sampling, set the threshold value. If you want to start sampling with a trigger input to CV, specify the corresponding CV input
firmware Update
Assimil8or allows you to download the firmware to a Micro SD card and easily update the firmware. The current version of Assimil8or can be checked from the "About This Module" by pressing the Utility button.
Put the downloaded file in the top folder of the micro SD card, insert it into Assiml8or and start it. Select Load Software from the Utilities button and click the encoder to update the firmware.
External Links