MUSICAL FEATURES
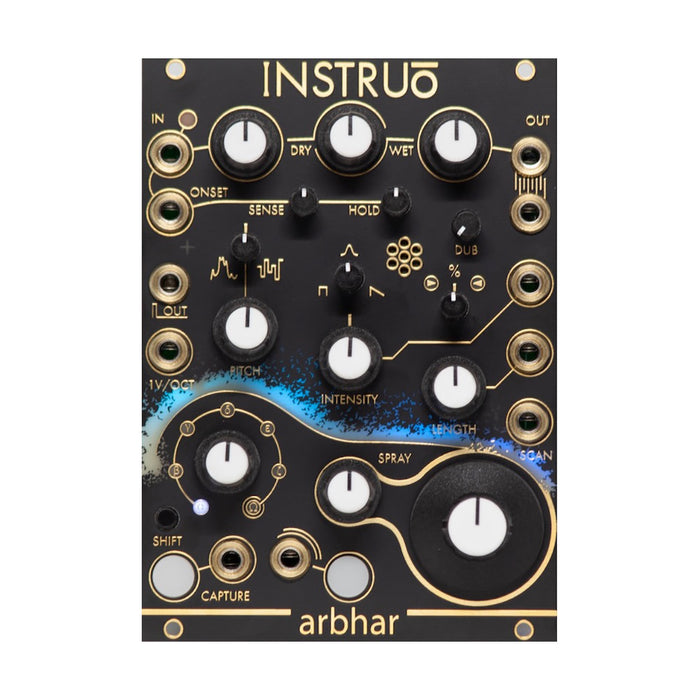
Arbhar is a new generation Eurorack granular processor. The sampled audio is chopped into short tones, blended, varying pitches and layered endlessly for a wide range of audio operations, from frozen smooth tones to glitched live instrumental sounds. I will.With a small condenser microphone built into the panel, audio analysis for automatic sampling, and internal modulation, Arbhar delivers unparalleled granular synthesis.
With the introduction of firmware version 2 (2023), we implement both technical and conceptual improvements.Complete rewrite of entire codebaseThis has improved the overall Arbhar user experience while keeping the overall feel the same.Increased efficiency and expanded capabilities will allow Arbhar to explore even more acoustic and musical spaces.
The main features are:NEWThe part marked withThis is an update point with firmware V2.
- Granular synthesis by Lexer method
- in stereo88(NEW)Super polyphonic that can simultaneously generate grains of
- Input can be switched between mono and stereo (NEW)
- Minimum grain length increased from 40ms to 5ms (NEW)
- Two types of granular engines can be used: one that controls the intensity and grain length, and the other that triggers the grain from the outside.
- Scan mode that specifies the grain playback position using CV, Follow mode that automatically plays at an adjustable speed, and Wavetable mode that loops grains at audio rate.
- Equipped with 10 sample buffers of about 6 seconds. The buffer contents remain even when the power is turned off.
-
Built-inPanel-accessible condenser microphone
- Equipped with an analog preamp limiter in the input stage
- Equipped with audio analysis function that can automatically start capture (recording)
- LED display showing audio size, length, playback position and spread
- Trigger output whose settings can be changed flexibly
- Grain playback direction probability can also be set
- Internal pitch modulation possible
- 1V / Oct input installed
- Dynamic control of grain playback window
- Control stereo pan/delay/reverb with Hold CV input
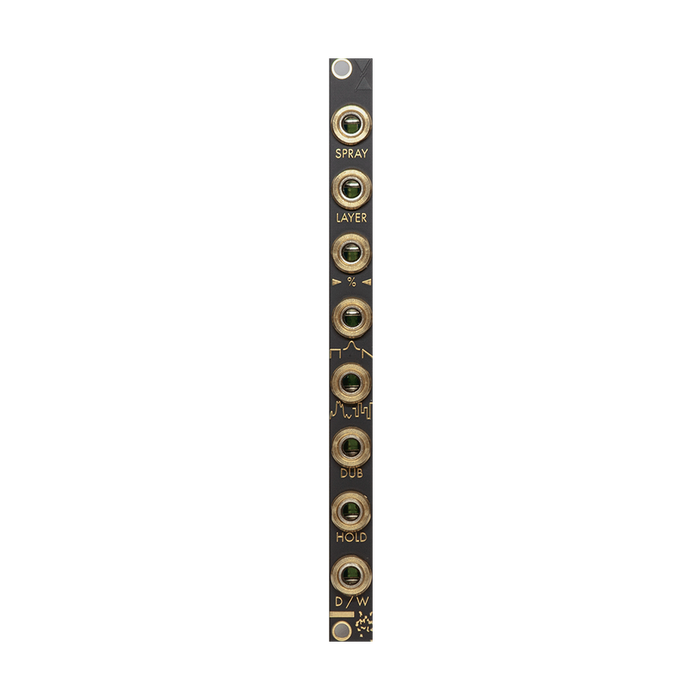
- 2HP expander (included with the main unit) allows CV control of not only main parameters but all parameters
- Equipped with user settings file function for complete customization (NEW)
- Copying, saving and loading between layers is possible (NEW)
- Six audio layers and user settings can be saved as a scene (NEW)
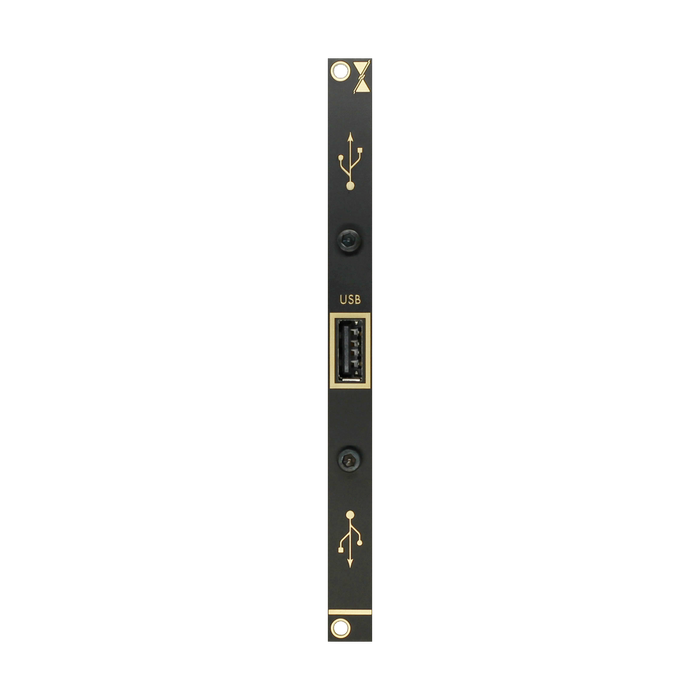
- Sample import/export to USB memory (NEW)
- Accumulative Capture Mode that records audio after the buffer can be selected (NEW)
- 6 selectable onset detection modes (NEW)
- Extended track & hold mode (NEW)
HOW TO USE
Arbhar uses a granular process to chop up captured audio or sound files loaded from USB and play them back, altering them in various ways.A single fragment of audioGrainIt is called. Arbhar can play 88 grains at the same time, creating thick sound layers.
Arbhar provides various parameters to control grain, and almost all of them can be controlled by voltage.Grain playback position, spread, level, etc. across modulesLED displayWill be reflected in the display.
Playback-related parameters include the recording playback position, the length of the note being played, the playback direction, the volume envelope, and the pitch.Some parameters, such as pitch and playback direction, can be randomized using only Arbhar's built-in functions.
The explanation of each part is displayed by mouse over
Input Section
At Arbhar,Main input jack, Onset Analysis input jack, built-in condenser microphoneYou can record sound from three input sources: .
Routing is microphone → onset input → main inputInternal connectionSo, for example, the sound from the microphone is input when not patched to the main and Onset inputs. At the input stageAnalog limiterIs installed to prevent digital clipping due to excessive volume.
Onset analysis Onset Analysis monitors and analyzes the spectrum of the input sound, and when it changes significantly.Automatically trigger recordingTo do.It is also possible to output a trigger by setting.Due to internal wiring, sound to the condenser microphone also passes through Onset Analysis. If you do not want to record with Onset Analysis, lower Sense or change Onset behavior with Shift+Capture+Layer (see Onset Analysis Setting below).
Input ismono/stereoIt is possible to switch.Switch by pressing Shift and Capture while turning the Grain window (described later) or by using a preset file.For stereo, the Onset input becomes the R input.Turn on the Analog Emulation option in the preset file to apply the same process to the input as the analog limiter installed on input L.
Output Section
The granularly processed audio is mixed with the original sound using the Dry/Wet control, passed through the Output Level, and output from the two Output jacks.If you want to output in mono, patch only to Output2.When patched to both, the signal is output in stereo, and by default each grain is randomly swung left and right using coin toss logic.
The phase of the signal from Output 2 can be reversed for a unique cancellation effect when converted to mono.Changes can be made by holding down Shift and Capture while turning Hold (described later), or from the settings file.
Grain Playback
Polyphony
In Arbhar, besides the internal trigger whose frequency is determined by Intensity,StrikeThe input allows you to trigger grains externally and mix them into the output.Each grain can be played polyphonically, and the total number of notes that can be played is 88 for the internal and external triggers.The pitch of each grain is affected by the 1V/Oct input, the pitch knob, and the Pitch Deviation control;Only updated at the moment of pronunciation(Sample & Hold), pitch control in the middle of pronunciation does not affect the grain.This allows for polyphony with distinct pitches for individual grains.
Follow Mode
With Arbhar's default settings, if the Scan control is constant, the grain playback position will not change, but if you switch to Follow mode, the playback position will automatically move, and Scan will control the movement speed. Follow mode is, can be switched by pressing Shift and Capture while turning Scan or by using a settings file. In Follow mode, the Strike button lights up white.
In Follow mode, buffer playback will be looped when Follow Mode Looping is On.The setting is ON by default, and ON/OFF can be switched in the settings file.The length of the loop can now be controlled with the Hold knob.When looping is enabled, the speed control by Scan is bidirectional, and rotating to the left of center will play in reverse.
Wavetable Mode
Recording is started and stopped by the Capture button, trigger input, and Onset Analysis.One layer (buffer) can record up to 10 seconds.If you start capturing and do nothing, recording will continue until the end of the buffer.Recording continues even if you change the playback layer midway through.Pressing Capture again during recording will stop recording.
You can change whether the gate input to the Capture jack is latch (turns capture ON/OFF with the gate) or momentary (captures only during gate High) by holding down Shift and Capture while turning Dub (described later), or by using the settings file. Is possible.You can also switch whether to press or release the capture button to start recording using the settings file.
There are 6 available layers from α to ζ for recording.LayerSelect by control. An Ω buffer that combines six can also be selected.In Ω bufferYou can select and play α to ζ using the Scan control.Also, the color of the buffer display changes for each layer.
Accumulative Recording Mode
By default, recording always starts from the beginning of the buffer, but you can resume recording from where you left off.Accumulative Recording Modeis also possible. This can be done by holding Capture and pressing Shift or by using a configuration file.When recording is stopped in this mode, the Capture button will flash amber.The recording position is automatically reset to the beginning of the layer when the recording head is paused past the 10 second mark.To manually reset the recording head, double-tap and hold the Shift button to enter Track and Hold mode, then press the Capture button.
Additionally, it is also possible to manually set the recording head to a specific position.
To do this, set the Scan knob to the desired position and double-tap the Shift button to
Press and hold to enter Track and Hold mode and press the Strike button.
Overdubs
The input sound can be recorded repeatedly in the buffer. How much of the existing sound is left after a new recordingOakAdjust with controls. Also press Shift + Capture + Strike to activate the current buffer state.savecan. If you don't like the new recording, press Shift + Strike to go back to the previous recording.undoTo do. If you repeat this, the buffer will be empty at the end, but press Shift + Strike again in that state to save the saved contents.Roadcan. This save function is very convenient when you want to return to the past buffer state after experimenting with various things while overdubbing.
Layer decoupling
Arbhar allows you to specify separate layers for recording and playback layers. You can change only the recording layer (LED amber) while keeping the playback layer (LED white) by turning the Layer knob while pressing Shift. When you select the Ω layer, the playback layer and the recording layer will match again.
Track&Hold
In Arbhar, by using the Track&Hold function, which involves pressing Shift twice before operating a knob or button, you can operate the parameter so that the changed parameter becomes effective only when you release Shift. Press Shift twice and the buffer display will turn green to indicate Track&Hold mode. Grain Window, Pitch, Pitch Deviation, and Intensity are the parameters that can be tracked and held.Among them, Pitch can be set while track and hold to adjust the pitch.QuantizeThere are functions that can be performed.At that time, the pitch will be displayed using the layer indicator as shown below.
+1 (-11) Semitone: White alpha - B
+2 (-10) Semitones: White beta - A#
· · ·
+5 (-7) Semitones: White epsilon - G
+6 (-6) Semitones: White zeta - F#
-5 (+7) Semitones: Amber beta - F
-4 (+8) Semitones: Amber gamma - E
· · ·
-1 (+11) Semitone: amber zeta - C#
Expander and Hold CV
The expander is equipped with CVin of Spray, Layer, Direction, Envelope, Pitch Deviation, Dub, Hold, Dry/Wet.However, the Hold CV input can be changed to any of the following controls using the preset function:
- Stereo Panning: Controls stereo width and panning movement using CV values. Increasing the CV from 0 will narrow the panned stereo width. Moving the CV in a negative direction changes the panning from a simple coin toss to something more random.
- Hold CV: Controls the CV of the Hold parameter.
- Stereo Reverb: Control the amount and parameters of reverb using the CV value. When CV is positive, it controls the reverb parameters, and Dry/Wet is fixed. Inputting 5V will freeze the reverb.When negative, only the wet signal is output, making it possible to obtain a shimmer effect.
- Delay: Controls the amount of delay and parameters using the CV value.When the delay is mono input, Out1 outputs a dry signal and Out2 outputs a wet signal.When inputting stereo, a fixed Dry/Wet mixed signal is output. When CV is positive, the feedback is fixed at 66% and the delay time is changed from 80ms to 1000ms.When negative, the delay time is 25ms-1ms, and the feedback is 99%, creating a Karplus-Strong effect.
Trig Out & Onset Analysis Setting
You can change the Trig Out and Onset Analysis settings by holding down Shift+Capture and turning the Layer knob, or from the settings file.
- alpha: Recording is triggered by onset detection of the audio signal.For each grain generated, a trigger signal is generated at the Pulse Output.
- beta: Recording is triggered by onset detection of the audio signal. A gate signal is generated at the Pulse Output and remains HIGH for the period set by the Hold Knob.
- gamma: generated GrainA trigger signal is generated at the Pulse Output.An additional trigger signal is generated during onset analysis.
- delta: A gate signal is generated at the Pulse Output and remains HIGH for the period set by the Hold Knob. It is useful to connect the Pulse Output to the Capture Pulse Input and set the Hold Knob to the same time period as the recording period.
- epsilon: Pressing the Strike Button generates a trigger signal on the Pulse Output.
- zeta: When playing in Follow Mode, an End of Loop (EOL) trigger signal is output from the Pulse Output at the end of the set loop time (Hold Knob).
When using stereo input, the Onset input recording trigger function is disabled, so alpha is the same as gamma, and beta is the same as delta.
FILE MANAGEMENT
Arbhar file structure
In Arbhar v2,
- Various setting items including those set with button combos
- Audio data contained in 6 layers
can be saved/recalled.The settings are stored in a text file called ****.txt, and the audio is stored in the form of a wav file.A collection of settings and 6 audiosscene, and one scene is stored together as one subfolder.Six scenes are stored in the main unit even when the USB is not inserted, and you can switch between them by selecting from the Load/Save menu below. A USB can store 1 banks each containing 6 scenes.It is also possible to change only the settings in the Load Configuration settings in the scene settings file and not change the audio content of the layer.In this case, only the preset will be recalled.
Presets inside the main unit
The scenes stored in the main unit are determined by the Load Configuration settings described above.Settings onlywithout changing the layer's audio content.Used to change only setting items at once to suit various uses. Presets 1 to 6 are as follows.For details on how to load, please refer to "Calling a scene" below.The complete parameter content of each preset ismanualFrom page 63 onwardsDefault Presets".
-
Preset1: This is a preset with specifications close to Arbhar Classic firmware V1. Mod CV is set to reverb
-
Preset2: This is a preset in which Mod CV has been changed to a delay from Arbhar Delay Preset1. The quantization table will be changed to octave.
-
Preset3 Arbhar Stereo: Preset assuming stereo input. Onset mode is changed to delta
-
Preset4 Follow Mode: Preset for follow mode where the playback position advances. Capture CV mode is set to Retrigger, and the playback position will be reset each time Capture is triggered.Also, the Onset mode is set to Zeta and the Quantize table is changed to Octave. Mod CV will be changed to Hold.
-
Preset5 Panning Mode: Mode for panning mono input. Mod CV becomes panning, and Onset mode becomes gamma.
-
Preset 6 Accumulative Recording Mode: An additional recording mode that basically records from the middle of the layer. Onset mode is delta
List of folders in USB
The USB consists of the following folders.
- _arbhar_library: A folder for storing samples to be loaded into layers. Up to 6x6=36 subfolders named (bank number)_(layer number)_sample can be stored, and each subfolder stores one wav file. If there are multiple files shorter than 1 seconds, they will be collected and arranged on a layer so that the length is 10 seconds.
-
_arbhar_scenes: A folder for storing and recalling scenes. (Bank number)_(Scene number)It can store up to 6x6=36 subfolders named _scene.Each subfolder contains a .txt file with settings and 6 wav files to load into the layer.. It is one of the setting items in Preset.txt.Load ConfigurationIn addition to calling up the entire scene by changing theSetting items only, or sixaudio onlyIt is also possible to call
- _updater: This is a folder created when updating firmware.
Load/Save menu mode
To load audio to a layer or load a scene, hold Shift and Capture while pressing Strike.Load/Save menu pageI will do it after entering.To return to the original mode, perform the same button combo operation. When you enter the Load/Save menu page, the buffer indicator changes color and looks like this:
- Call/Copy layer: Magenta to Purple
- Scene call: yellow to red
- Save scene: orange to green
If it is not the page you want, press Capture and Strike to move to a different page and the indicator color will change accordingly.
-
Copy layer: After selecting the copy source layer, go to the layer save page of the Load/Save menu ( magenta to purple)Transition to.Select the layer you want to copy to and double-tap Shift.
-
Loading layers: layer you want to loadAfter selecting , go to the layer save page of the Load/Save menu. ( magenta to purple)Transition to.Turn the layer knob to select the sample. You can preview the sample while holding down the Shift button.Once you have decided on the sample to load, double tap Shift.
-
Calling the scene: Load/Save menu scene call page (yellow to red)Go to.Turn the layer knob to select a scene.Once you have decided on the scene, double tap Shift.
- Save scene: Load/Save menu scene save page(orange to green).Turn the layer knob to select the destination slot.Once you've decided, double-tap Shift.
About how to select layers and samples
レイヤー用のサンプルやシーンは、本体上に1バンクx6サンプル(または6シーン)、6バンクx6サンプル(または6シーン)でそれぞれ42ありますが、保存先や呼び出し元として選択する場合はレイヤーノブ単独で選択します。レイヤーノブを回していくと選択しているバンクが本体→USB1→USB2→・・・→USB6と変わり、その中で選択しているサンプルやシーンが切り替わっていきます。
You can tell the current bank by the color of the Ω.When it is a main bank, the Ω will glow white, and when it is a USB bank, the Ω will glow amber.Furthermore, when using a USB bank, the USB bank number is displayed by the number of LEDs that shine in amber color between α and ζ.The position of the white LED shining between α and ζ indicates which sample (or scene) in the bank is selected.For example, in sample 3 of the main bank, Ω is white and γ is white. For sample 2 of USB bank 4, Ω is amber, α and β are amber, and δ is white.The video shown is please use this form.Please look.
CHEAT SHEET
List of settings switching using buttons
| Features |
Button operation |
|
Separation of recording layer/playback layer
|
Hold Shift and turn the Layer knob to switch only the recording layer |
|
Track & hold
|
Double tap and hold Shift while turning the knob |
|
On-set switching
|
Hold Shift and Capture and rotate Layer |
|
Follow mode ON/OFF
|
Hold Shift and Capture and turn Scan
|
|
Output phase adjustment
|
Hold Shift and CaptureHoldTurn fully clockwise to prevent phase inversion.Fully counterclockwise inverts the phase (default).It is recommended not to invert the phase when outputting in stereo.
|
|
Capture gate input momentary/latching switching
|
Hold Shift and Capture while turning Dub, fully clockwise for momentary, fully counterclockwise for latching |
|
Input mono/stereo switching
|
Hold Shift and Capture while turning the Grain window (envelope) knob, fully clockwise for stereo, fully counterclockwise for mono. |
|
Accumulative recording mode On/Off
|
Toggle by holding Capture and pressing Shift |
|
Enter the scene menu (Load/Save menu)
|
Hold Shift and Capture and press Strike.Return with the same operation. Switch pages with Capture or Strike. |
| Factory reset & reboot |
Hold Shift and Capture and press Strike 7 times. |
List of setting items
For example, the settings for the parameter CaptureButtonMode in the configuration file are as follows. /* ... */ are comments that contain explanations about the parameters.The actual code is only the PARAMETER: CaptureButtonMode: 0 part, so if you are creating from scratch, you only need to write that part.If you want to refer to the factory preset file Arbhar.txtplease use this form..
/*
---------------------------------------------------------------------------------------------
Capture Button Modes: Latching or Momentary
---------------------------------------------------------------------------------------------
arbhar's Capture Button can be set to Latching or Momentary Modes.
Latching Modes will activate recording when the Capture Button is pressed and deactivate
recording when the Capture Button is pressed again.
Momentary Mode will activate recording as long as the Capture Button is pressed and will
deactivate recording when the Capture Button is released. This behavior might be more
appropriate for certain use cases, including capturing shorter samples when using the
Accumulative Capture Mode.
0 - Latching (Default)
1 - Momentary
Note: This parameter might overwrite the 'Activate Capture On Button Up' parameter.
*/
PARAMETER: CaptureButtonMode: 0
The list of parameters that can be changed in the settings file (****.txt in the scene subfolder) is as follows.
PARAMETER: Load Configuration: Presets, Layers, and Scenes:
When loading a scene, arbhar allows you to choose between presets, layers, or the entire scene.
- Preset reads all parameters defined in the configuration file and ignores audio files present in the _arbhar_scene directory.This option is equivalent to having only configuration files in the directory.This is the factory preset setting.
- Layers loads the first six audio files present in the _arbhar_scene directory and ignores all parameters defined in the configuration file. The arbhar control behavior remains the same, but the layer's audio file is replaced.This option is the same as if the directory contains audio files but no configuration files.
- Scene will read all parameters defined in this configuration file and the first six audio files present in the _arbhar_scene directory.
PARAMETER: InputMode:
arbhar can function in both mono or stereo input mode.In stereo input mode, the input is the left input and the onset input is the right input.The sensitivity knob acts as a level control for the onset input.
PARAMETER: AnalogEmulation:
arbhar allows for analog emulation of onset inputs to equalize left and right sound quality in stereo input mode.
PARAMETER: PhaseSwitch:
By default, arbhar's Output 2 is inverted in phase from Output 1.
•If you want mono input/mono output patching, set Phase Switch to phase-inverted.If you want mono input/stereo output patching, set Phase Switch to phase correction.If you want stereo input/stereo output patching, set Phase Switch to phase-corrected.
PARAMETER: CaptureCVMode:
Arbhar's CV capture behavior can be set to one of three capture modes: Momentary Capture Mode, Latching Capture Mode, and Retrigger Capture Mode.
• Momentary Capture Mode records while the signal at the Capture Pulse Input remains HIGH.This is best used with gate signals.
• Latching Capture Mode starts recording when a rising edge signal is received at the Capture Pulse Input and continues recording until another hard edge signal is received.This is best used with trigger signals.
• Retrigger Capture Mode restarts recording whenever a rising edge signal is received on the Capture Pulse Input, but does not interfere with the state of the capture.
PARAMETER: CaptureButtonMode:
arbhar's Capture Button can be set to Latching mode or Momentary mode.
• Latching mode starts recording when the Capture Button is pressed and stops recording when the Capture Button is pressed again.
• Momentary mode starts recording while the Capture Button is pressed and stops recording when the Capture Button is released.This behavior may be suitable for certain use cases, such as when capturing short samples using Accumulative Capture Mode.
PARAMETER: ActivateCaptureOnButtonUp:
You can set it to record when you press or release a button.
By default, pressing the Capture Button starts recording.This parameter can be changed and recording can be set to start when the Capture Button is released.This behavior may be suitable for certain use cases, such as when using Accumulative Capture Mode or using the built-in condenser microphone to minimize button noise recording.
PARAMETER: AccumulativeCaptureMode:
This mode allows you to successively combine different recordings at different positions within a layer.When enabled, pressing the Capture Button will pause the record head instead of resetting to the start of the layer.
PARAMETER: LinkAccumulativeRecordingCaptureAsGate:
arbhar can be configured to link Accumulative Capture Mode and Capture Button Mode.This allows a link to activate Capture Button Mode when Accumulative Capture Mode is enabled.
PARAMETER: OnsetMode:
Arbhar features six Onset Control modes that analyze significant spectral changes in the input audio to estimate the onset of new sound events.These modes are alpha, beta, gamma, delta, epsilon, and zeta.
PARAMETER: StrikeButtonToTrigger:
arbhar can configure the Strike button to generate a trigger signal on the Pulse Output when pressed.If this feature is disabled, pressing the Strike button will not generate a trigger signal on the Pulse Output.If this feature is enabled, pressing the Strike button will generate a trigger signal on the Pulse Output
PARAMETER: StrikeCVDelay:
Arbhar can be configured to apply a trigger delay to Strike Input.This defines the time added to the Strike Input delay time.Adjusting this delay is useful for improving sample-and-hold accuracy when the trigger signal occurs before the CV.
PARAMETER: FollowMode:
Arbhar can be set to either Scan mode or Follow mode.
• In Scan mode, move through layers with the Scan knob, set playback position at any point, and freeze audio playback.
• In Follow mode, audio playback is internally triggered and directed, and the Scan knob becomes the speed control at which the recorded grain progresses.This mode allows you to change the playback speed of a layer independently of the pitch control. The Scan knob controls speed from 20x (fully counterclockwise) to 1/20th (fully clockwise).
PARAMETER: FollowSpeedDirection:
Arbhar allows you to configure the behavior of the playback speed control (Scan knob) in Follow mode.
• With Unidirectional, the playback position is only forward. Playback speed is slowest when the Scan knob is set fully counterclockwise. Playback speed is fastest when the Scan knob is set fully clockwise.
• Bidirectional sets the playback position to move forward or reverse. When the Scan knob is set to the center position, the playback speed will be the slowest. When the Scan knob is set fully clockwise, playback speed is fastest in the forward direction. If the Scan knob is set fully counterclockwise, playback speed will be fastest in reverse direction.
• With Inverted Unidirectional, the playback position is only forward. Playback speed is fastest when the Scan knob is set fully counterclockwise. Playback speed is slowest when the Scan knob is set fully clockwise.This is the same as unidirectional, but the behavior of the Scan knob is reversed.
PARAMETER: FollowScanOffset:
Arbhar allows you to set a Scan offset in Follow mode if the Follow mode playback speed is set to be controlled by the Scan knob and the Scan CV input.
PARAMETER: FollowPositionOffsetWithScanCV:
Arbhar allows you to configure the behavior of the Scan knob and Scan CV input in Follow mode. The Scan knob and Scan CV input can be set to control playback speed, Scan offset, or both
PARAMETER: FollowLoop:
Arbhar can enable or disable playhead loop playback in Follow mode.
Note that if Follow mode looping is set to disabled, the bidirectional option for Follow mode speed control will also be omitted and automatically set to unidirectional.
PARAMETER: FollowSetLoopLengthWithHold:
Arbhar can control the length of loop playback in Follow mode with Hold.The end of layer (EOL) trigger signal is triggered at scan offset in Follow mode and can be looped during the hold period.This is the same EOL trigger signal available in zeta Onset Control mode.
PARAMETER: RandomTimingWithRandomIntensity:
Arbhar allows you to set random timing of grains.
Random timing of internally triggered grains can be applied by turning the Intensity knob from the center position to the fully clockwise position.
PARAMETER: RandomAmpWithRandomIntensity:
Arbhar can randomly set Grain's new clothes. By turning the Intensity knob from the center position to the fully clockwise position, you can apply a random amplitude of internally triggered grain.
PARAMETER: ModCV:
You can set the Mod CV Input target.
PARAMETER: WavetableCentreFrequency:
You can set the center frequency of Wavetable mode in Hz.
PARAMETER: QuantiseTable:
The clockwise behavior of the Pitch Deviation knob sets the available pitch variation. Each clockwise step of the Pitch Deviation knob uses the pair of numbers in the list and the "original" pitch set by the Pitch knob as the Pitch Deviation parameter.
firmware Update
The firmware update procedure is as follows.
-
please use this form.Download the latest firmware from
- open source software to burn .iso and .img files,'balena Etcher'download and install.
- Connect the micro SD card to your computer.
- Launch balenaEtcher and select the firmware zip file (compressed image file) from "Select image"
- Press Flash!
- When you're done, remove the SD card, put it back into the module with the power off, and power it on without patch cables.
- Module loads new firmware