Below is the description for firmware v1.x.Modules sold after 2023 have firmware v2 or later installed.The description will be updated in February 2023.
MUSICAL FEATURES
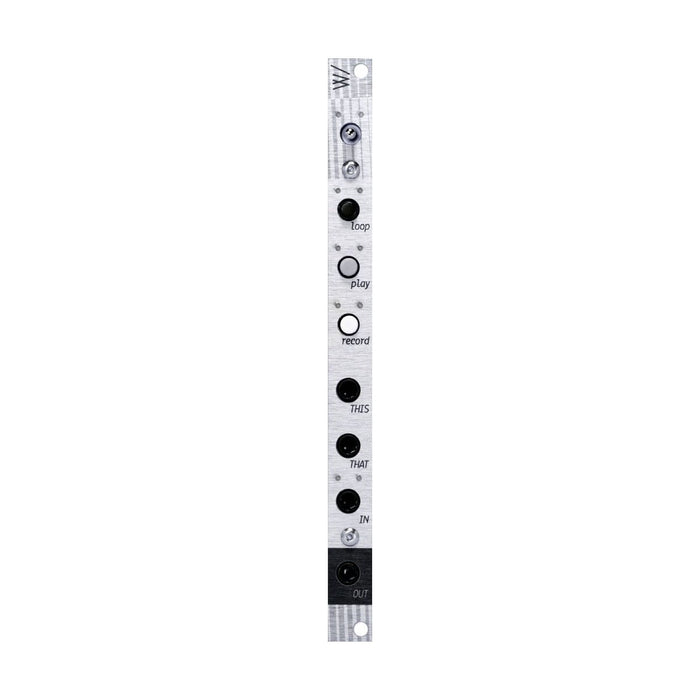
W / (with) is an audio recorder looper sampler that imitates a tape with a recording time of 8 hours.
The recorded audio can be played back at the same speed, double speed, half speed, etc., hitting the Cue point for cueing, and playing back and back while continuously changing the speed. Even if the power is turned off, the recorded data and the information of the last playback point will be retained. It also becomes a one-shot sampler that can also perform 1V / Oct pitch tracking. When combined with the recording function, you can perform multiple recording / playback such as sound-on-sound, or even sound patch like a mysterious tape delay.
HOW TO USE
Modes
W / has three main modes: Live mode, Nav mode, and Cue mode. There is also a Global mode that allows you to make some settings. The operation and operation method of each mode is as follows. (The module comes with a small sheet that describes all button and switch operations).
Live mode
In this mode, if the Play button is pressed once and no modulation is applied, tape playback / reverse playback and looping will be performed at the same size. The tape speed can be doubled or halved. Other Cue points can be added, loops between Cue points, recording and overdubbing can be performed. The playback direction of the tape does not change unless in loop mode, so if you want to hear what you recorded, rewind in Nav mode before playing. If you want to play in reverse, press the Play button in Nav mode while pushing the momentary switch down.
You can punch in and punch out the recording by triggering this jack. Also, the CV to the That jack determines how the original sound remains during recording, and changes from overwrite (-5V) to overdub (0V) to overwrite (5V). When the voltage to That is negative, each overdubbing also causes deterioration of sound quality similar to tape.
- Push the momentary switch down to add a Cue point at the playback point
- Pushing the momentary switch up adds a Cue point at the playback point and loops
- Press the Loop and Record buttons to add a Cue point at the playback point and record from there.
- Press and hold the Play button and push the momentary switch up to double the playback speed.
- Hold down the Play button and push the momentary switch down to halve the playback speed
- Hold the Loop button and push the momentary switch up to move the playback point to the next Cue point.
- Hold down the Loop button and push the momentary switch down to move the playback point to the previous Cue point.
- Press the Record button for 1 second to enter Global mode
- Push the Loop button to switch the loop state
- Push the Record button to switch the recording On / Off state
- Hold down the Record button and push the momentary switch down to toggle overdub on / off.
Nav mode
In Live mode, press the Play button once, and if no modulation is applied, the tape is still. In this mode, the playback speed of the tape can be continuously controlled by the voltage of the That input, and the reverse playback is performed with a negative voltage. This input can select the loop location by CV when looping.
- Press the Play button to start playback and switch to Live mode
- Push the Play button while pushing the momentary switch down to switch to Live mode while playing in reverse.
- Press the Record button while holding the Loop button to switch to Cue mode
- Rewind while pushing the momentary switch down (you can hear the rewind sound)
- Fast forward while pushing the momentary switch up (fast forward sound is heard)
- Hold the Loop button and push the momentary switch up to move the playback point to the next Cue point.
- Hold down the Loop button and push the momentary switch down to move the playback point to the previous Cue point.
- Press the Record button for 1 second to enter Global mode
- Push the Loop button to switch the loop state
- Push the Record button to switch the recording On / Off state
- Hold down the Record button and push the momentary switch down to toggle overdub on / off.
Cue mode
In this mode, audio is played only while the Play button is pressed, and it functions as an audio audition or as a one-shot sampler. At this time, This functions as a trigger gate for one-shot playback, one shot is played until the next cue with a very short trigger, and a longer gate signal is played only while the gate is ON.
- Press the Loop button to return to Nav mode
- Hold Play and push the momentary switch down, release Play to switch to Live mode with audio playing
- Plays the sound only while you press the Play button
- Press the Loop button to return to Nav mode
- Press the Loop and Record buttons to add a Cue point at the current tape playback position
- Press the Record button to save and delete Cue points
- Rewind while pushing the momentary switch down (you can hear the rewind sound)
- Fast forward while pushing the momentary switch up (fast forward sound is heard)
- Hold the Loop button and push the momentary switch up to move the playback point to the next Cue point.
- Hold down the Loop button and push the momentary switch down to move the playback point to the previous Cue point.
- Press the Record button for 1 second to enter Global mode
Global mode
From Cue mode, press the Record button for 1 second to enter Global mode. The following settings are possible.
- Push the momentary switch up to exit Global mode
- Press the Record button to toggle whether to monitor audio input
- Press the Loop button, then the button to select a tape, and push the momentary switch down to load that tape.
- Delete all Cue points by pressing Record while pressing the Loop button (firmware 1.1 or later)
If you turn on the power while holding down the switch while pressing Record, the white LED of Play will blink. Press the Play button and then the button corresponding to the tape you want to erase to delete all audio and Cue points on the selected tape.
Assign another function to This / That (Firmware 1.2.1 or later)
With the firmware 2018.11.17 released on November 1.2.1, 4, in addition to bug fixes, the functions of This and That jack in Live mode were added. In addition to the default feature settings (This: punch in / out of recording / That: balance control of overdub), four feature pairs have been added to allow you to assign This and That to those settings.
To change the assignment, hold Record and patch to This or That to enter assignment selection mode. The orange LED indicates the THIS function, and the white LED indicates the THAT function. The functions are arranged in the following order from the top of the LED position. Since the default is the Dub function, the two LEDs of the third Play from the top are lit. You can change the functions of This and That by using the buttons and switches corresponding to each function. If you want to split and use a pair like This is Transport and That is Dub, you can hold down the button corresponding to This's function (top in the example) and press the button corresponding to That's (in this example, Press (3rd from top).
-
Transport (Selected with switch up in Select mode): This is the CV input that specifies the playback cue point, and That is the tape speed control CV input. Both have the same functionality as This and That in NAV
-
Signal (Selected by pressing the loop button in selection mode):This outputs a CV that indicates the current playback position within the Cue, and outputs a Trigger when That passes the Cue point.
-
Dub (Selected by pressing play button in select mode):By default this will be the punch-in / out trigger input for recording and That will be the overdub balance control input.
-
Caption (select in record mode by pressing record button): This is a CV recording input (a CV can be recorded in parallel with audio), and a CV recorded by That is output (the tape position and status are reflected as with audio). If you are monitoring, you will hear the added CV to This.
-
Sample (selected with switch down in select mode): This is a trigger input that immediately moves to the Cue point that passed most recently, and That is a CV input that exponentially controls the tape speed. It is a speed control that is easy to use to make harmonies and sequence arrangements with overdub.
FIRMWARE UPDATE
The firmware of W / can be updated by playing the audio file. PCs, smartphones and tablets can also be used as playback devices.
-
please use this form.Download the latest firmware from
- Power down the W / installed modular synth, patch the audio output from the firmware audio player to the IN input
- Set the volume of the playback device to about 3/4. When playing on a smartphone etc., make sure that all sounds other than the firmware, such as notification sounds, do not come out.
- Hold down the record button and turn on the modular synth. White record LED blinks slowly
- Start playing the firmware file. If successful, the white LED will go up and down, and occasionally the orange LED will glow.
- W / will restart automatically when the end is over