The Erica Synth Black Sequencer takes traditional modular sequences to the next level by adding the many features required of modern modular synthesis. Black Sequencer can set 4 channels of CV, Gate, Modulation output, sequence pattern of up to 64 steps that can be chained, independent Time Division, Multiplication, Length for each track, CV and Gate recording function, built-in quantizer , MIDI input / output, etc., are equipped with various functions required for electronic music / experimental music performance.In addition, while providing various parameters that can be programmed for each step, basically one button is arranged for one function to realize intuitive and easy operation.Acts as a master controller for any modular setup.
4 CV / Gate / Modulation tracks
CV / Gate / Mod recording function (supported from FW V1.02)
Probability, Repeats, Ratcheting that can be set for each step
Microtonal tuning
Shuffle function that can be adjusted for each track
Timing Division / Multiplication for each track
The quantizer can select the masking timing from the time of inputting the notes of the sequence or the time of outputting the input notes (firmware 1.04 or later).
Random pattern generator
16 memory banks that store 16 patterns
SD card slot for backup / firmware update
Includes one 16GB micro SD card
Includes one 3.5mm TRS to MIDI DIN cable
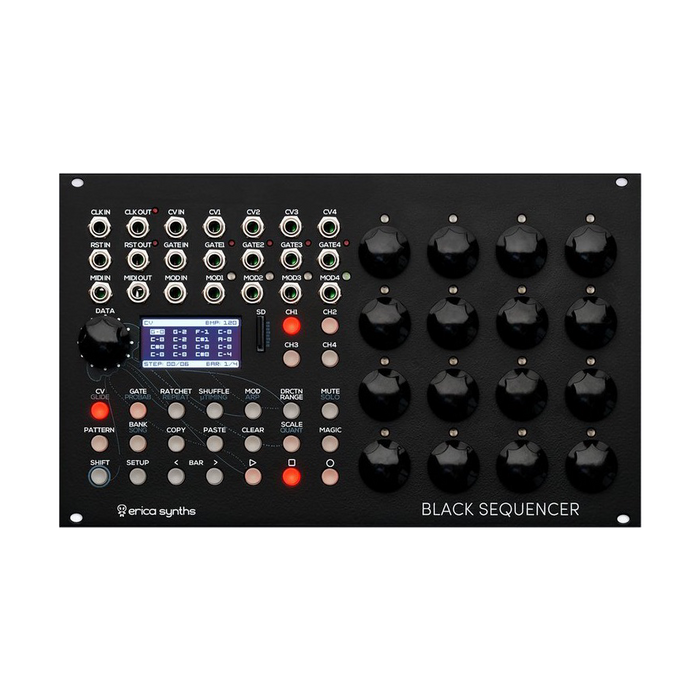
Interface
The explanation of each part is displayed by mouse over
HOW TO USE
The Black Sequencer has four simultaneously playable channels that output CV, Gate, and Modulation signals, and the length of each channel (track) can be set from 4 steps to 2 steps.All parameter settings for all 64 channels are saved as one pattern, 4 patterns are stored as a set in one bank, and 1 banks are saved as one project on the SD card.In addition, each bank can store 16 songs.
Programming a Pattern
This section introduces the basic operation of the Black Sequencer.For convenience, the top left corner of the step encoder is number 1, the right side is number 2, and number 3, and the bottom right is number 16.
Select CH1 with the CH selection button and click the PLAY button to run the sequence.The sequence begins to progress through the pattern. You can adjust the master BPM of the sequence with the DATA encoder to the left of the OLED. You can also change it by 10 BPM by turning it while pressing the SHIFT button.Click the PLAY button again to pause the sequence at the current step.Click the STOP button to reset the sequence to the first step.To reset the running sequence to the first step without stopping, hold down the SHIFT button and click the STOP button.
For programming and editing of various parameters of the sequence such as scale, gate length, shuffle and modulation, transport, initial setting of the module, etc., use the 21 function buttons that are clearly organized in the lower left part of the module.Click the function button at the top left, the CV button, to enter the CV menu. By operating the 16 step encoders, you can set the scale of the corresponding step.For programming parameters such as gate length and glide setting for each step, ratchet and repeat number, click the corresponding function button to enter the menu and set the value with the step encoder or DATA encoder.At this time, you can see that hints such as [DATA] and [1] [2] are shown under the parameters displayed in each menu.This shows the encoder that corresponds to the control of the desired parameter, which helps you see the control knobs at a glance. To enter the menu of gray-labeled parameters such as GLIDE, PROBAB, REPEAT, ARP, hold down the SHIFT button and click the button.
Designing a Modulation Track
Each channel of the Black Sequencer is equipped with a individually configurable modulation output that can be used for CV control of external modules.To set the modulation track details for any channel, select the channel with the CH select button, hold down the SETUP button and click the MOD button to enter the MOD SETUP menu. By turning the DATA encoder, you can select 9 types of control voltage such as stepped CV, various envelopes, LFO and trigger.Click the MOD button again to return to the step-by-step MOD settings.
Managing Patterns, Banks and Songs
Changes to the pattern being created are recorded in the sequencer's temporary memory, but they disappear when you switch to another pattern or turn off the power of the main unit. A blinking RECORD button indicates that the information you entered has not been saved.To save the pattern information, hold down the SHIFT button and click the RECORD button.As a result, the setting information of all 4 channels included in the pattern is saved in the selected bank.If you want to save the modified pattern as a new pattern without overwriting the current pattern, click the PATTERN button to open the pattern page, hold down the RECORD button, and hold down the RECORD button for the step encoder that corresponds to the desired pattern slot. Click.Please note that this method can only save to an empty slot.
To access the project (16 set of 1 banks) stored on the SD card, hold down the SHIFT button and click the PATTERN button.To save a new project, hold down the DATA encoder and turn it, then select NEW. Enter the project name using the 16-step encoder and press the DATA encoder again to confirm.This will save the projects that can be backed up to your computer to the SD card.
To design a song that plays a series of patterns in a bank sequentially, hold down the SHIFT button and click the BANK / SONG button to enter SONG mode. Press any of the 16 step encoders to load the song, or open the NEW SONG design menu when the song slot is empty. If you select NEW SONG, you can design a series of patterns by simply pressing the step encoder.A red LED above each step encoder indicates that there are saved patterns available for song assembly.You can also repeat the pattern by clicking the same encoder multiple times.You can also use the DATA encoder to navigate through a series of patterns and modify or insert some patterns in the song.To save the song, hold down the SHIFT button and click the RECORD button.
Performance Mode
The Black Sequencer implements a PERFORMANCE MODE that enhances expressiveness during performance. Access by pressing the MAGIC button while holding down the SHIFT button During this mode, the OLED displays a dedicated screen that allows you to apply a transpose to the selected track and currently adjust the role in sync with the master BPM. You can add it to your notes. You can turn the DATA encoder to transpose the track in octaves, or press the step encoders 1-12 to transpose the sequence in semitones.The four step encoders below apply roles to the sequence.Encoder 4 is track 13, encoder 1 is track 14, and so on. Turn the corresponding encoder to set the roll ratio, and click to apply the roll to the current note.
To make minor changes to the sequence, hold down the DATA encoder and press multiple step encoders.The selected step becomes active and you can change the parameters at the same time. Taking the example in the CV menu, you can change the pitch of all the selected steps at the same time by operating one of the selected step encoders.From each menu, parameters such as gate length and ratchet can be controlled in the same way.
CV, GATE, MOD & MIDI Input Routing
The Black Sequencer can change the sequence with external signals (keyboard, LFO, gesture controller, etc.) from the four input jacks of CV, Gate, Mod, and MIDI.The input signal can be assigned to a single output or multiple outputs at the same time, and to set it, click the SETUP button to enter the SETUP menu. Open the INPUT and OUTPUT settings page with the DATA encoder and set each. Gate always goes through the selected channel. Refer to the hint (step encoder number) displayed on the OLED, and change the input source with step encoder 4 and the function with step encoder 1.The available options are:
OFF: OFF:Corresponding outputs are unaffected by input CVs and MIDI messages.
FILL:Receiving the input CV and GATE (or MIDI note on message) replaces the notes in the sequence with the input CV while the incoming gate is high. GATE OUT will also be in the high state while the incoming gate is high.
ADDFILL:The input signal is added to the sequence while the incoming gate is high.The output gate will also be in the high state while the incoming gate is high.Also, if the sequence has paused steps (gate length 0), they will be replaced with gate high and incoming CV.
ADD:The incoming CV is added to the notes in the sequence, but the incoming gate is ignored.Since this function is a latch type, the added CV value is maintained even if the keyboard is released.
THROUGH:The incoming CV and gate signals flow directly to the corresponding CV and GATE outputs, while the sequence for that channel is invalid.It can be used as a MIDI to CV converter, which is convenient for control with a MIDI keyboard or controller.
CV, Gate and Modulation Record
Instead of manually constructing the sequence step by step, you can record the sequence to the Black Sequencer via an external source such as a MIDI keyboard or CV / Gate keyboard. When using a MIDI keyboard, connect it to the MIDI IN jack, and when using a CV / Gate keyboard, connect it to the CV IN, GATE IN, and MOD IN jacks, and use the CH button to select the channel to record. Only one selected channel can be recorded at one time.After selecting the desired channel, hold down the SETUP button and click the RECORD button to enter the RECORD setting menu.In the setting menu, scroll with the DATA encoder and select the setting with the step encoder No. 1.
SOURCE: Select any recipient from MIDI (MIDI IN) or ANALOGUE (CV, GATE, MOD IN).
FASHION: Select the recording mode from OVERDUB, RECORD, INSERT, FILL.
MOD REC: Modulation Turns recording on and off.If turned onThe MOD output will automatically switch to the Slided Step Modulation setting, and any previously designed modulation track will be lost.
NOTE QNT: Select whether to apply the quantize scale selected for the current track.When on, the recorded note values are quantized to the selected scale.
GATE LEN: Sets the initial value of the gate length in some recording modes.
DISPLAY: Turns the note input monitor on / off.When on, the CV corresponding to the keyboard information played on the keyboard is output directly from the CV OUT, so you can check the scale.
POP-UP: Turns on / off the "visual metronome", which is convenient in OVERDUB and RECORD modes.
Settings Menu
The SETUP menu confirms the basic information of the module, sets the initial value of each parameter, and calibrates the sequencer. Click the SETUP button to enter the SETUP menu.Menu icons are arranged clockwise from the upper left as shown below.
Info menu: You can check the module firmware and boot loader information.You can also manually update the firmware and restart the module here.To restart the module, hold down the SHIFT button and click Step Encoder # 1.
Display settings menu: Set the contrast adjustment of the OLED screen, the presence / absence of the automatic dimming function, and the time to start, the setting of the presence / absence of the pop-up screen in a specific menu, the presence / absence of the OLED screen saver, and the time to start.Use step encoders 1 to 4 for adjustment.
General settings menu: Set items that affect the overall function of the sequencer.[1] BAR FOLLOWTurns on to enable automatic scrolling of the screen while creating a sequence of 16 steps or more.[2] MASTER RSTEnables the reset signal output from RST OUT at the end of the master track by turning it on. When OFF, the reset will occur on the longest track in the pattern.[3] CV MUTESelects the CV output of the muted channel from three operating options. STAY-The CV output of the muted channel follows the CV value of the sequence. FREEZE-When the channel is muted, the CV will stop at the last used note value. DROP-The CV value of the muted channel drops to 3V.[4] CLOCK OUTAllows you to select the clock output resolution from 1, 2, 4 ppqn.The unit ppqn is the number of pulses per quarter note, and the default setting is 4.[5] RESET OUTNow, set the output timing of the trigger signal from RST OUT depending on whether the PLAY button is pressed at the start or the STOP button is pressed at the stop.Use the associated step encoder for adjustment.
DEFAULT settings menu: Set the initial note value, initial gate length, and gate status that are applied when a new sequence is created or when the sequence is deleted by the CLEAR function.If you select OFF in the STATE that sets the initial gate state, all gates will be muted in the new sequence.
CALIBRATION menu: Caribrate the module for your system.You can also set the CV output to fit a particular VCO.To do this, click on the DATA encoder to enter calibration mode and follow the onscreen instructions.The module is calibrated to 1V / Oct and shipped, so if your VCO is tuned to 1V / Oct, no calibration is required.
MIDI settings menu: Make settings related to MIDI input / output.The menu consists of multiple pages and is navigated using Step Encoder # 1. MIDI OUT outputs up to four MIDI note messages, a note on / off message based on the gate length, and one CC message according to the Modulation CV setting (MIDI CC outputs only modulation CV, envelope and Other modulation settings such as triggers are not output). Turn the DATA encoder to select a track and set the following on the first page: 4. Select MIDI channel for each track. 1. Adjusting note velocity.All notes in the channel have a fixed velocity value.It does not support step-by-step velocity settings. 1. Set the pitch bend width according to the range of the pitch bend wheel of your synthesizer. The second page is for setting MIDI CC messages to send modulation CVs, and the third page is for MIDI INPUT settings to set the MIDI notes and note on / off message reception channels for each track.The final 2th page sets the MIDI channel and MIDI CC to receive the modulation CV information.The received CC is recorded in the modulation CV.
CLOCK setup menu: Select a clock source.INTERNAL- Run the sequence with the internal clock.EXTERNAL- Use this setting when using the master clock from an external module, etc. Patch the clock source to CLK IN, and the screen will show the BPM of the master clock and the accuracy of the clock.The default setting accepts a 4ppq clock.MIDI- Uses an external MIDI clock from the MIDI IN jack.By default, it accepts the standard 24ppq MIDI clock.Use the DATA encoder to switch the clock source.
IN / OUT menu: Make settings related to input / output. On the INPUT settings page, assign the input for the channel.This allows you to use MIDI IN and CV IN to change the content of the corresponding channel in a variety of ways.See also the CV, GATE, MOD and MIDI INPUTS section above.
FIRMWARE UPDATE
To perform a Black Sequencer firmware update, power off your system.Remove the SD card from the unit and copy the latest firmware file to the root directory of the SD card.Return the SD card to the machine and turn on the system power.This machine automatically identifies and uploads the latest firmware and deletes the old one.Even if you update the firmware, the patterns created and saved will remain, and they can be used with the new firmware.If you want to back up or replace the created pattern, copy the PROJECTS folder to your computer.